I wasn't going to break this down because we've seen it a thousand times, but a fellow poster requested it, so here it is.
After the Lynch run, SEA substitutes out the FB in exchange for a WR. They go from 21 personnel to 11 personnel (1rb/1te/3wr). NE counters, not by adding a nickel CB, but by taking out a CB to add a DL. They come with 4DL, 4LB, 3DB. Pete gave an explanation that NE was in their goaline package, and that's why SEA wanted to throw against it. Because NE only had 3 DBs in the game, while SEA had 3 WRs.
If SEA was to run out of this personnel, it's 5OL +1 TE blocking 4DLs and 4LBs. It's not so much that you want to throw against that, it's that you don't want to run against it. But that's whiteboard logic.
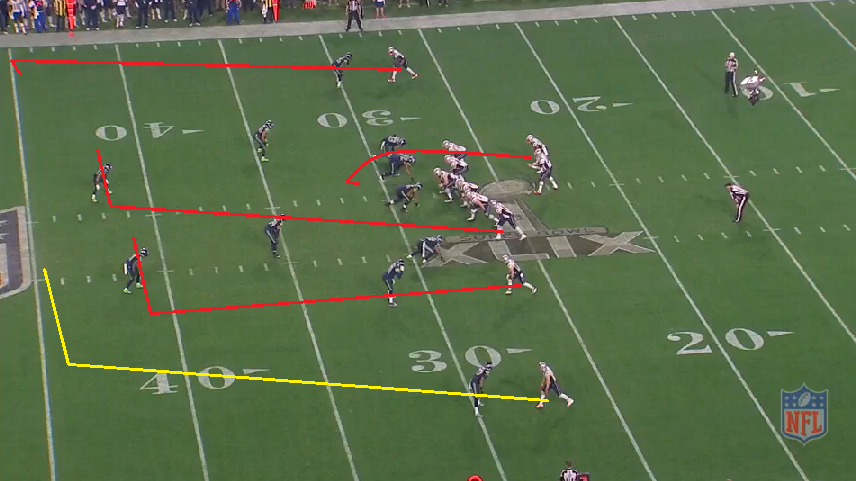
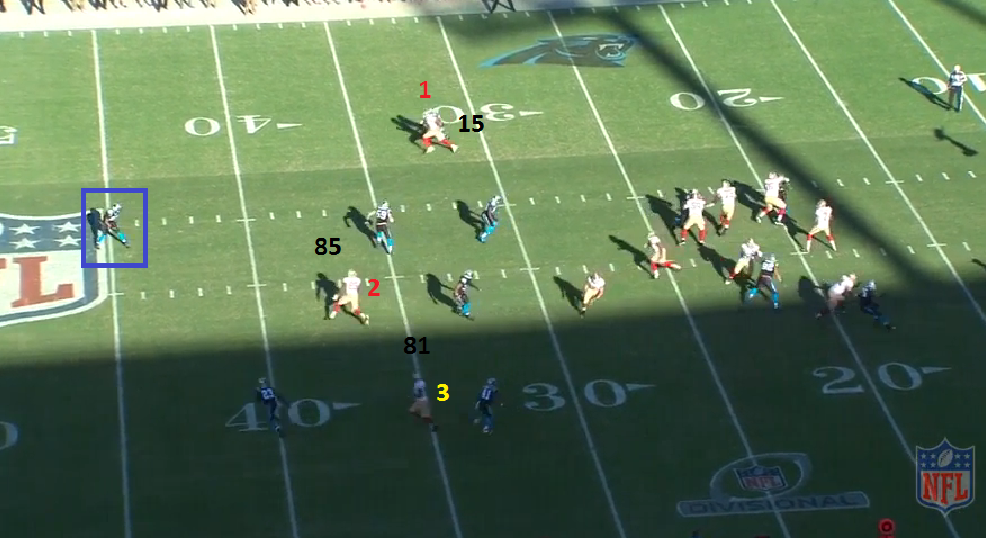
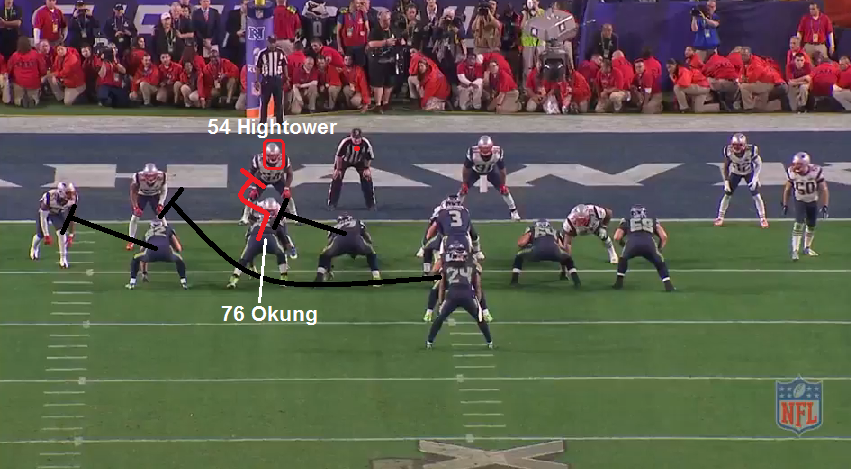
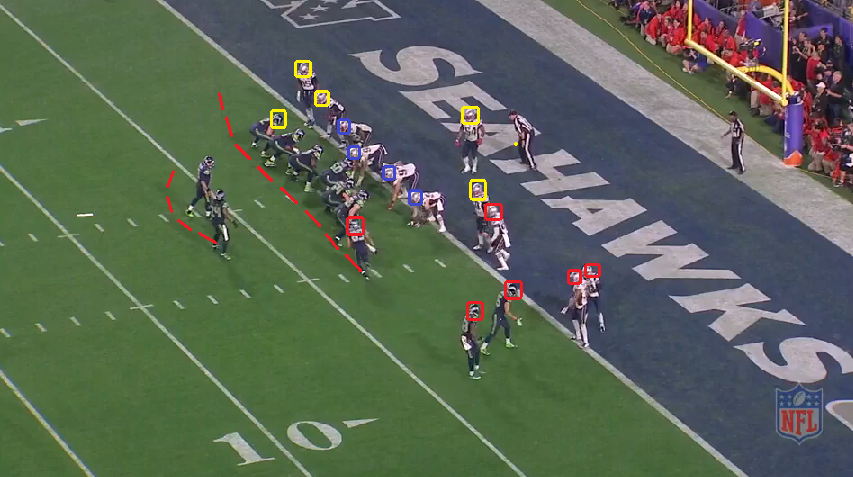
NE: blue = DL, yellow = LB, red = DB
SEA: yellow = TE, red = WR
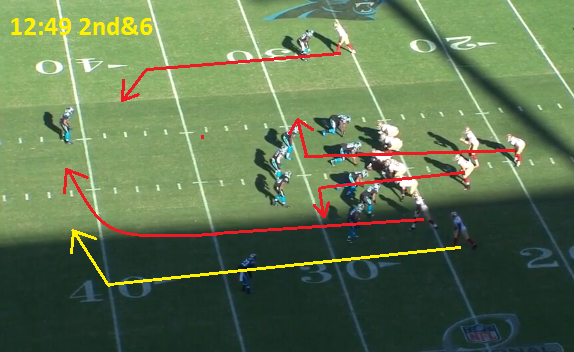
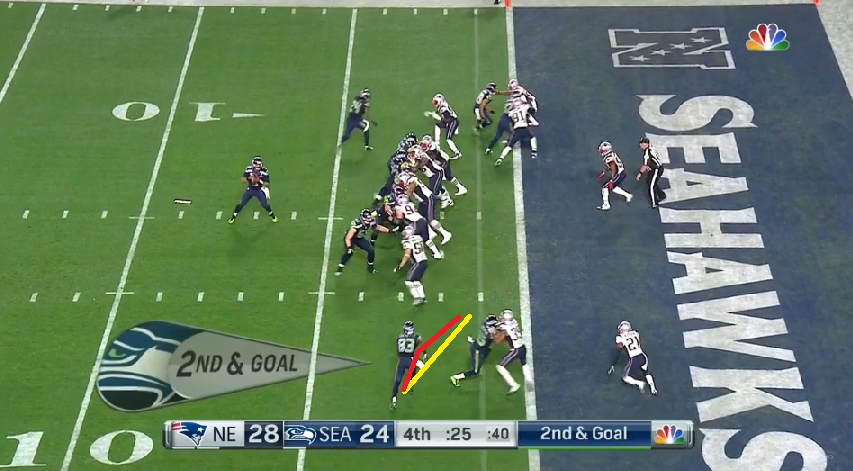
SEA initially lines up like this. But Baldwin and Lynch will shift. When RW sees Revis follow Baldwin across the formation, he confirms man coverage.
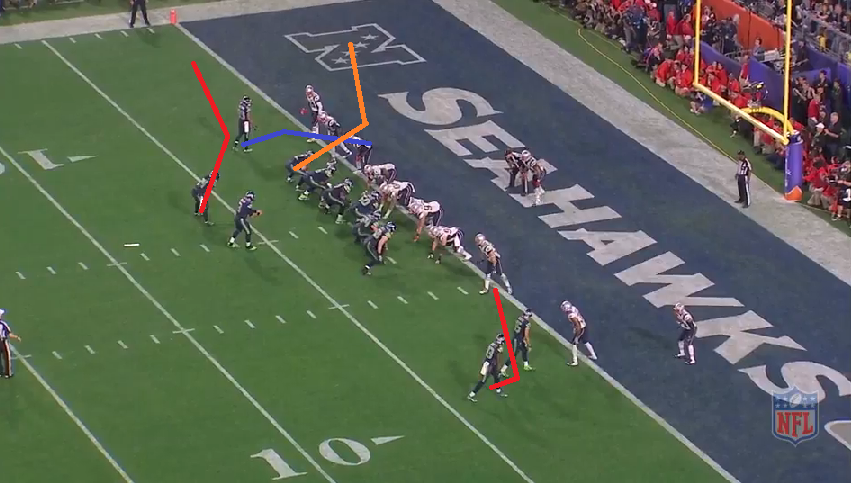
Lynch and Baldwin shift, then set.
SEA: To RW's left is a variation of the Spot concept. A zone busting concept that when run out of a bunch, could work against man coverage. To RW's right is a quick slant out of a stacked WR set. The stack is used to combat man coverage and provide the WR in back with a clean release off the line of scrimmage.
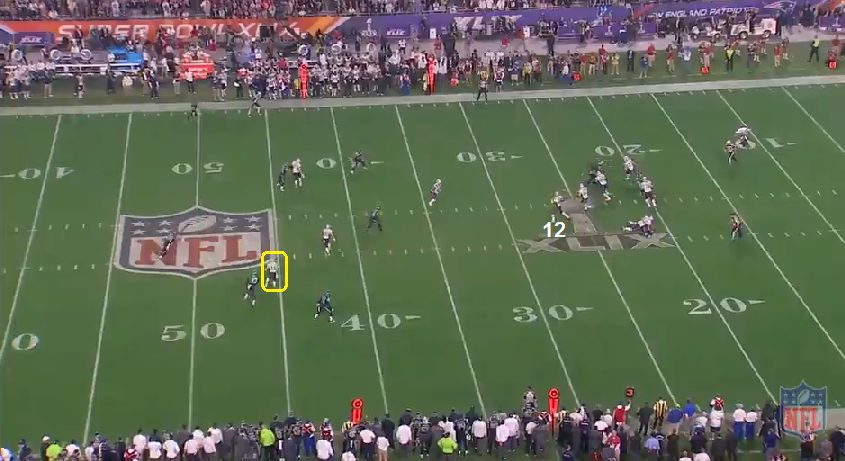
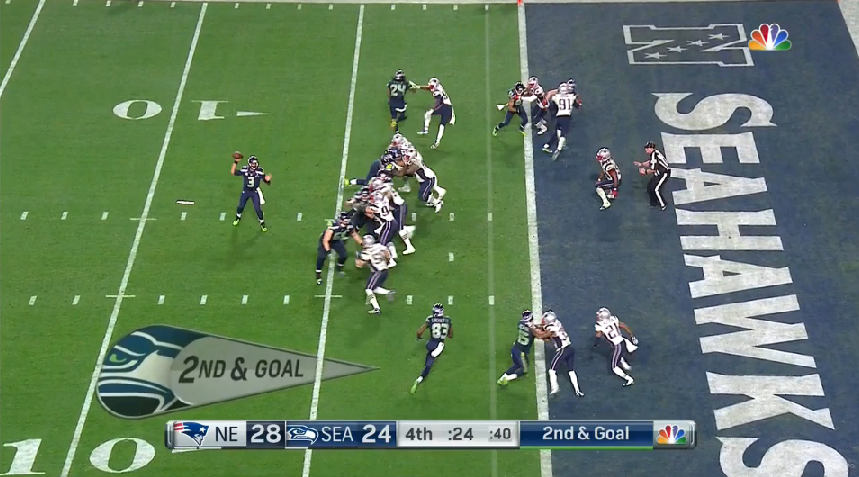
NE: cover1 (5 man pressure)
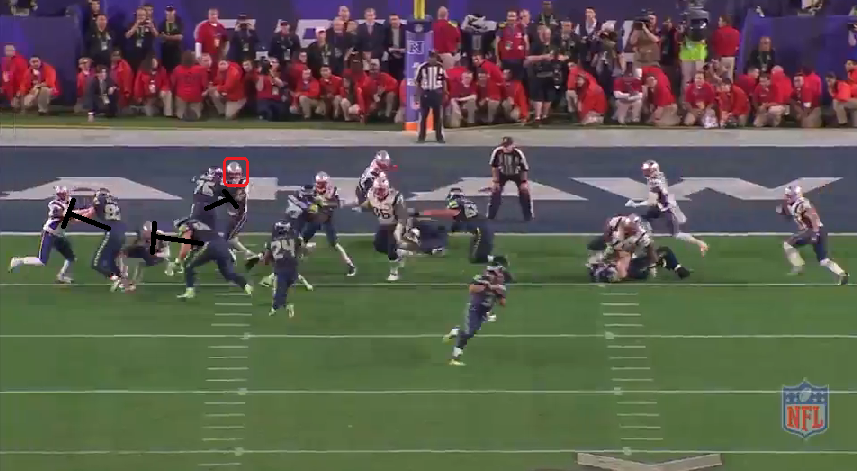
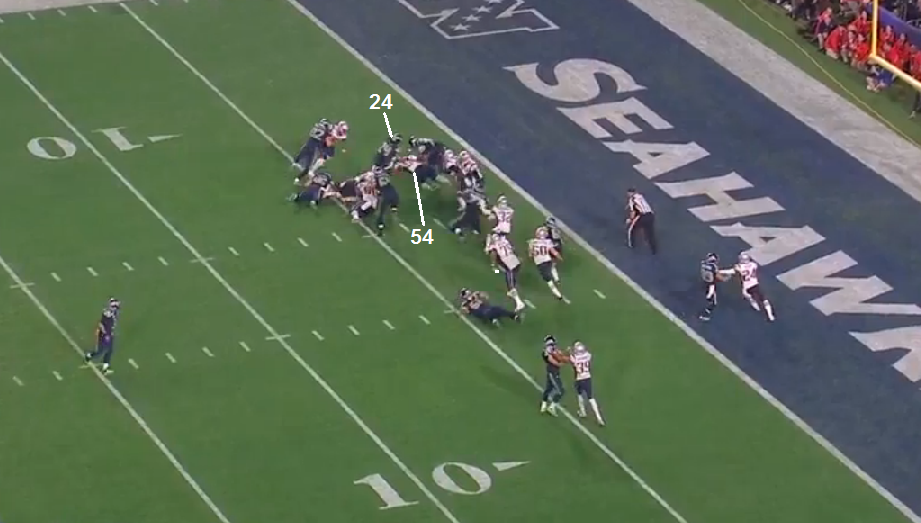
The ball is snapped and CB Browner lunges forward to aggressively jam the WR (Kearse).
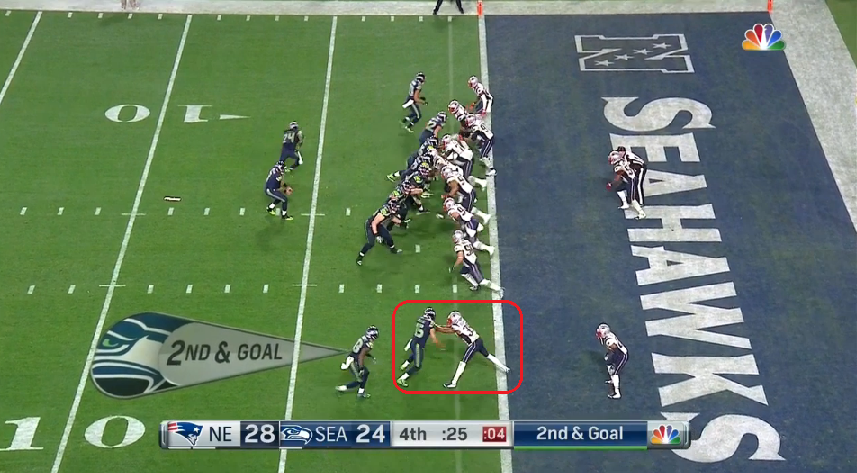
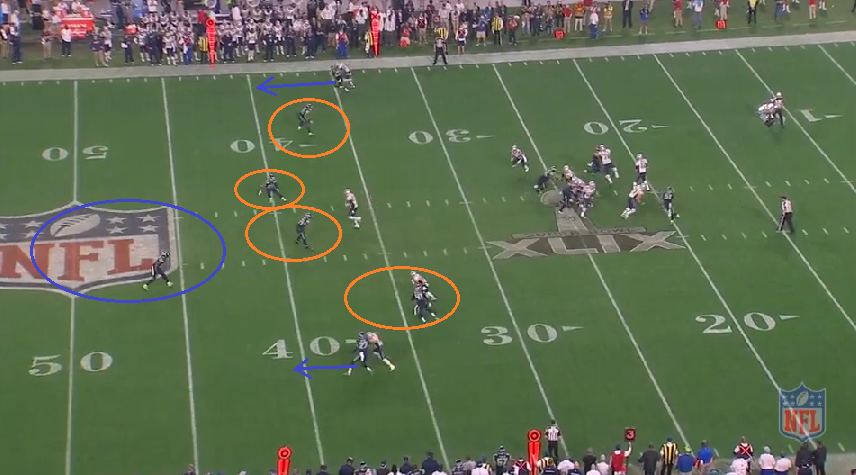
RW will look to the man buster side. Kearse can't quickly get upfield to run a pick. Once Butler, shown looking at Lockette, sees Lockette's right leg plant like that (orange), he knows it's an inside breaking route.
This key frame shows a misstep here by Lockette as he steps too parallel to the line of scrimmage. He takes the route of the red line. He should take the route of the yellow line. The whole reason Kearse is there is to provide that yellow path. It's a hard slant and the more of a direct path Lockette can take, the more his body will play a factor in shielding the defender from the ball. Butler has started his break on the route.
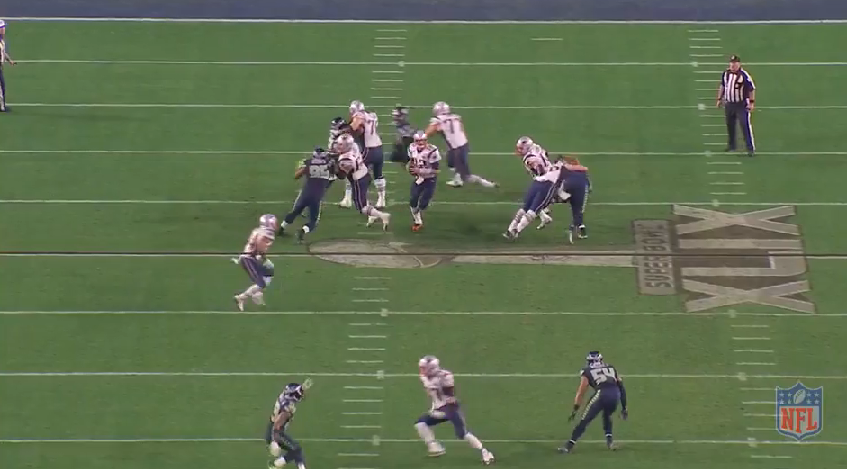
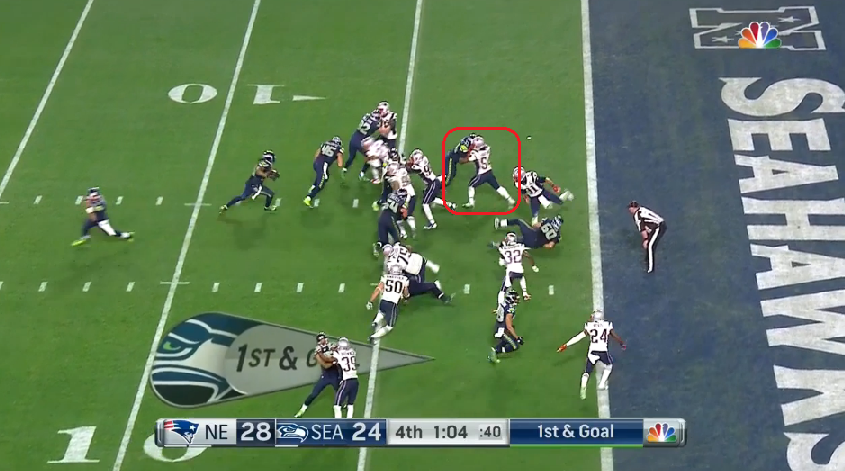
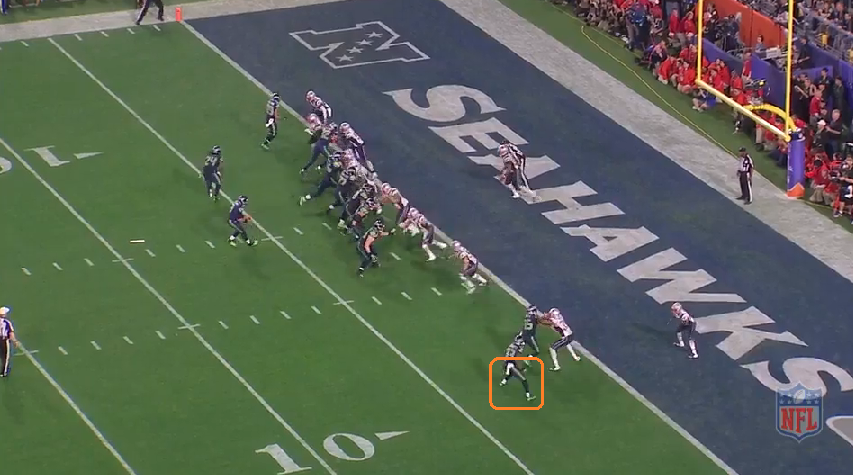
Because Kearse can't move Browner upfield, Butler has a clear path to the ball.
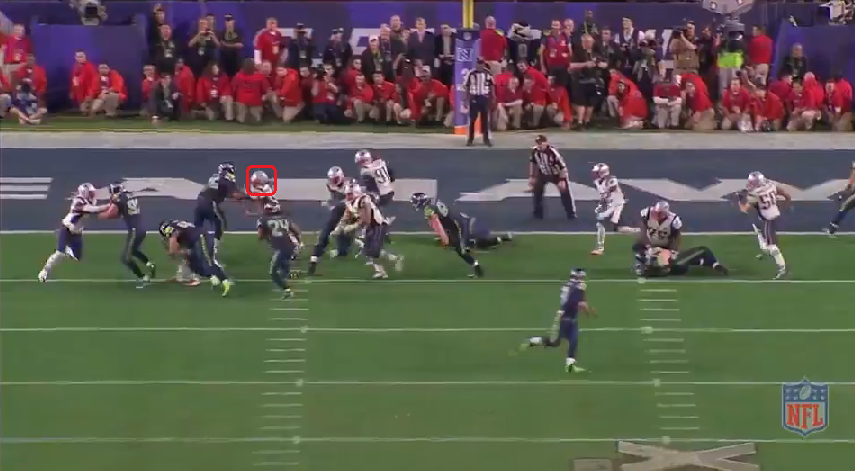
The sloppy route by Lockette can be seen here. It's just one step, but when the whole route consists of only 6 steps, they all need to be sharp. The throw itself needed better placement where only the WR has a chance - even if it forces the WR to make a difficult catch.
[ Edited by thl408 on Feb 5, 2015 at 11:40 PM ]