Originally posted by jonnydel:
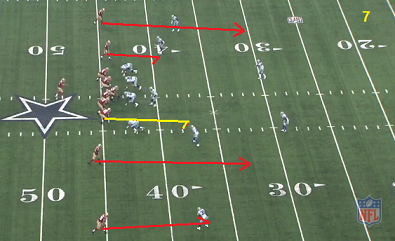
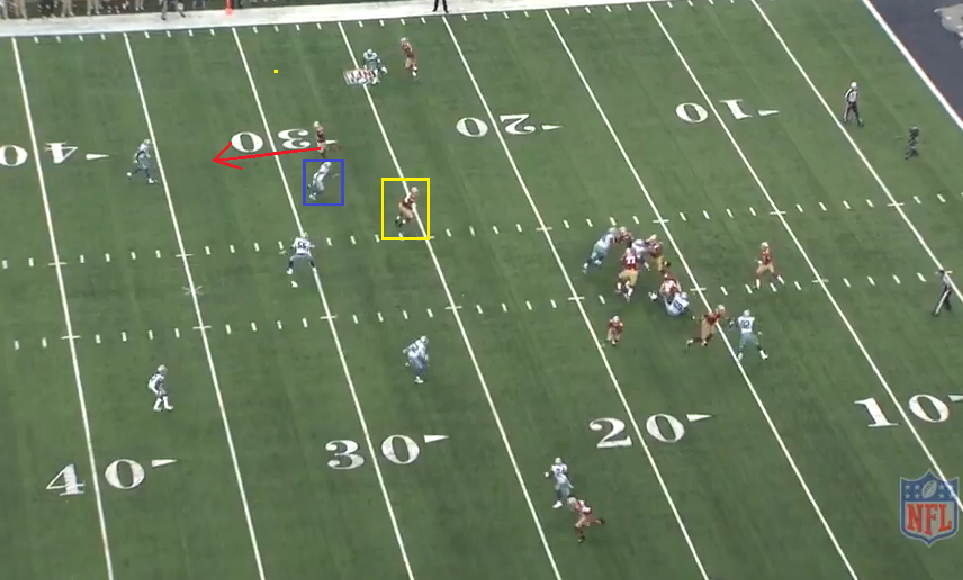
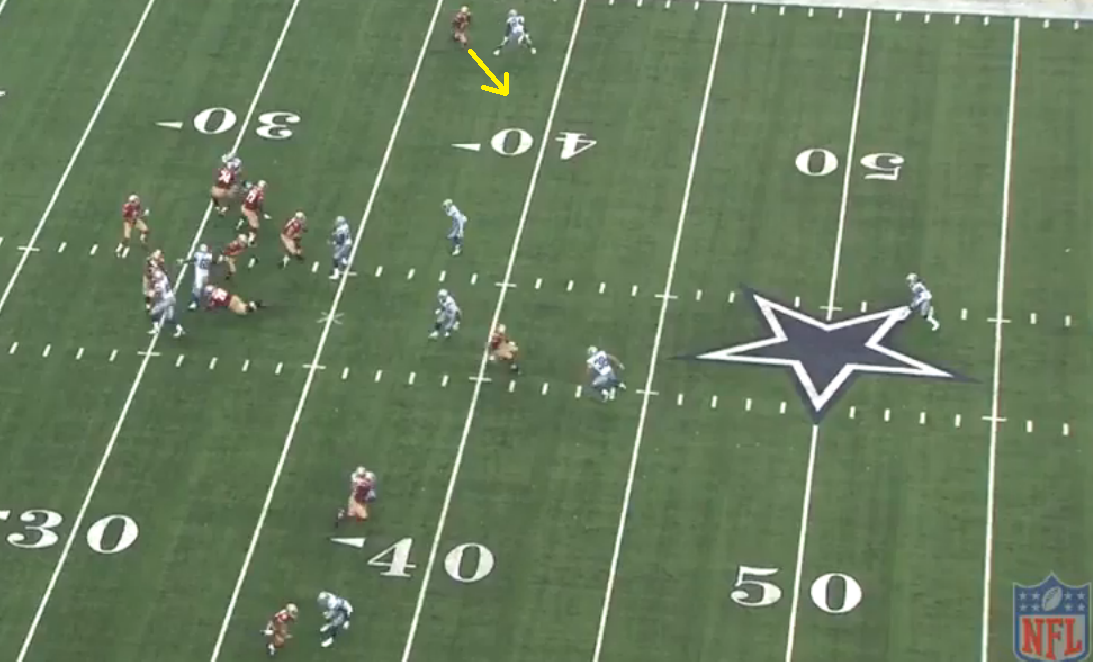
Originally posted by Niners816:It's a horizontal stretch, we had run it a couple times during the game, both times we hit VD for a 6-7 yard gain. This time, Dallas tries to take VD out of the play - you can see the double team. This is one reason CK flashes back to Johnson.
Originally posted by thl408:
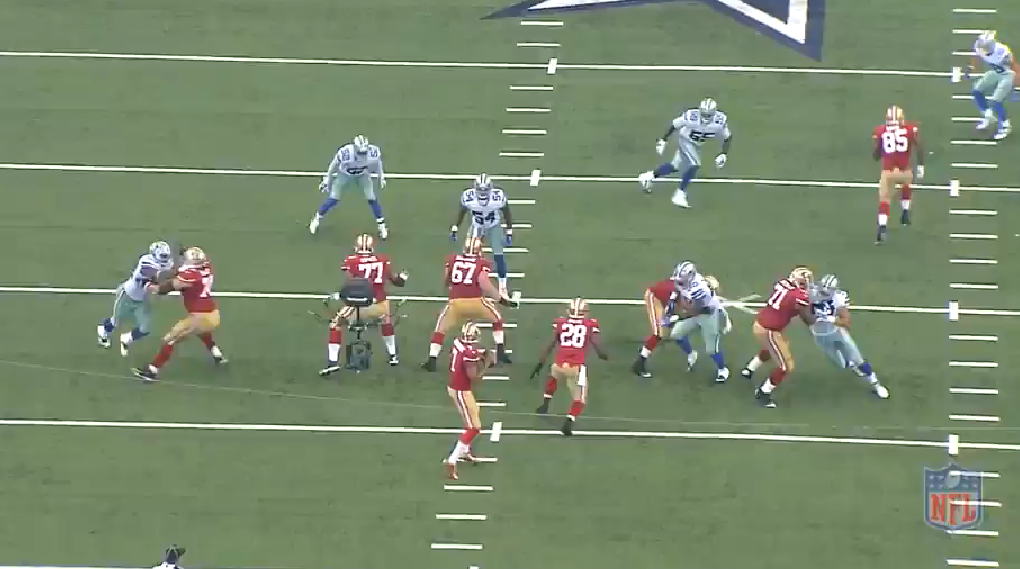
Here is classic SJ at work using unorthodox methods to win a clean release off the line of scrimmage.
The 49ers are running a zone busting concept on the right (more on that route combo later), and SJ "the one man man coverage buster" on the left.
Kap takes the snap and looks right, he will red light (determine it is not open) the zone busting concept. Also, by looking right, Kap holds the Curl defender (the defender 4 yards in front of Iupati) from blocking the throwing lane to SJ's slant.
Kap looks to his left towards SJ and is shown starting his throwing motion. Notice the CB on SJ and how the CB's hips are turned toward the sideline. SJ has set up his man for a hard inside break on the slant.
Look right, then come back to the left to SJ.
This is how SJ sets up his man. SJ was not in pre-snap motion. So all his movements shown below is done post snap. What WR starts off with two sidesteps? By doing this, he tricks the CB into thinking SJ wants an outside release off the line of scrimmage, only to break inside and get separation.
By initially looking to his right, Kap is giving time for SJ to do his shake and back. Once Kap comes back to his left, it is on rhythm to throw the backside slant to SJ.
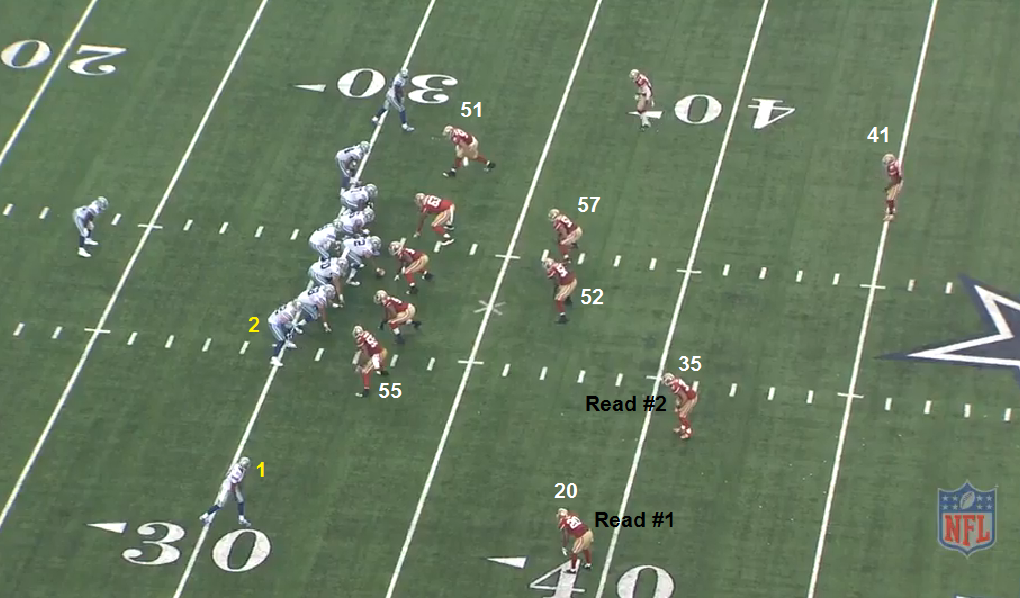
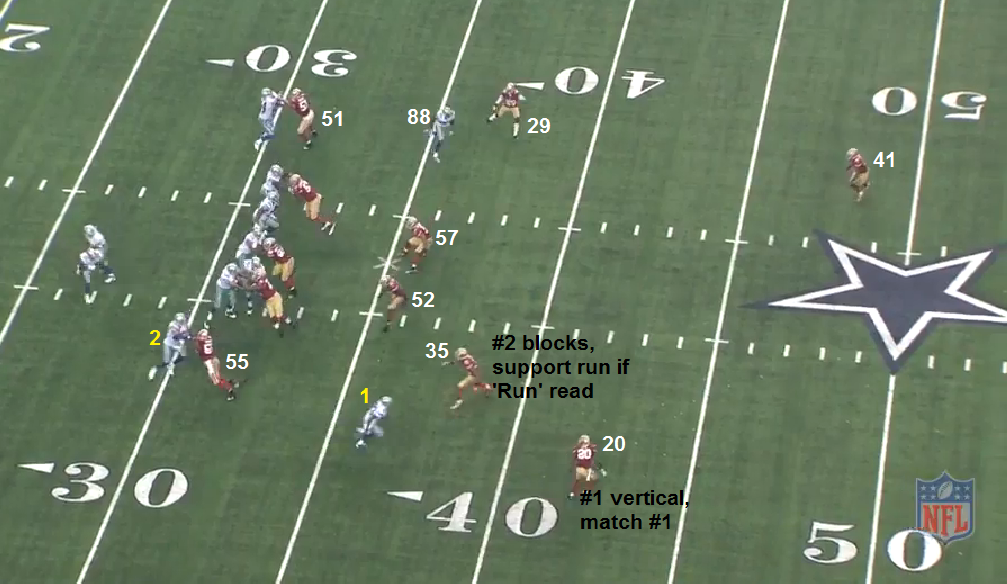
I was wondering what was on the concept side of that play. It's like an all curls/spacing with a go to create both a vertical and horizontal stretch.
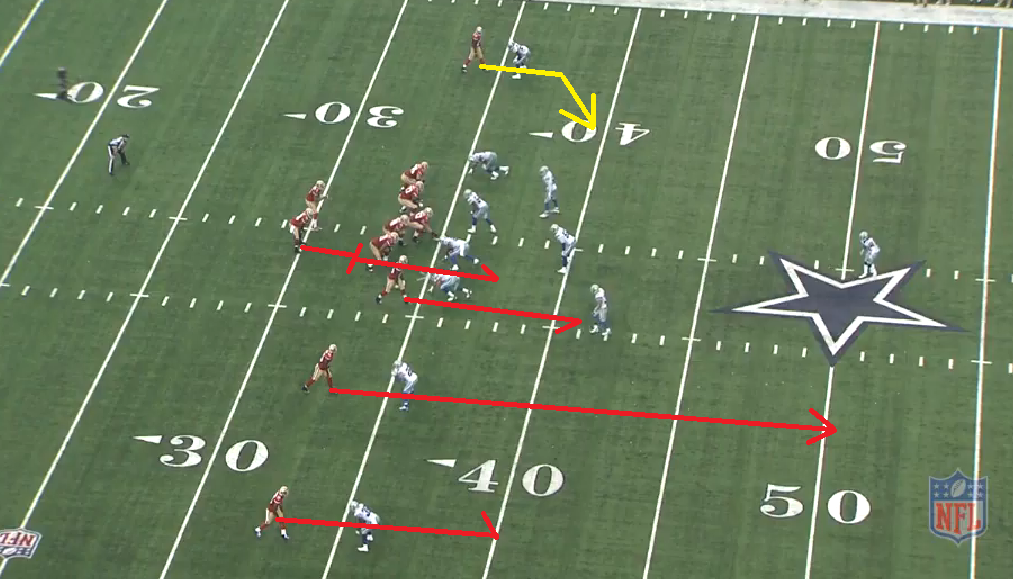
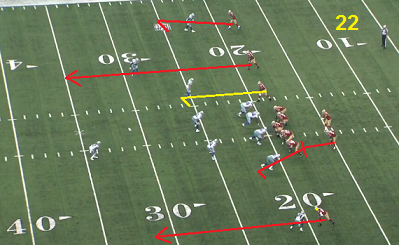
Agreed, it's a horizontal stretch. The two curl routes are a miniture All-Curls concept, while the vertical route is just to clear out a defender. The 49ers ran this route combo in plays #7, 17 , and 22. #7 and #22 resulted in completions to one of the Curl routes. #17 is the SJ slant when DAL played man coverage.