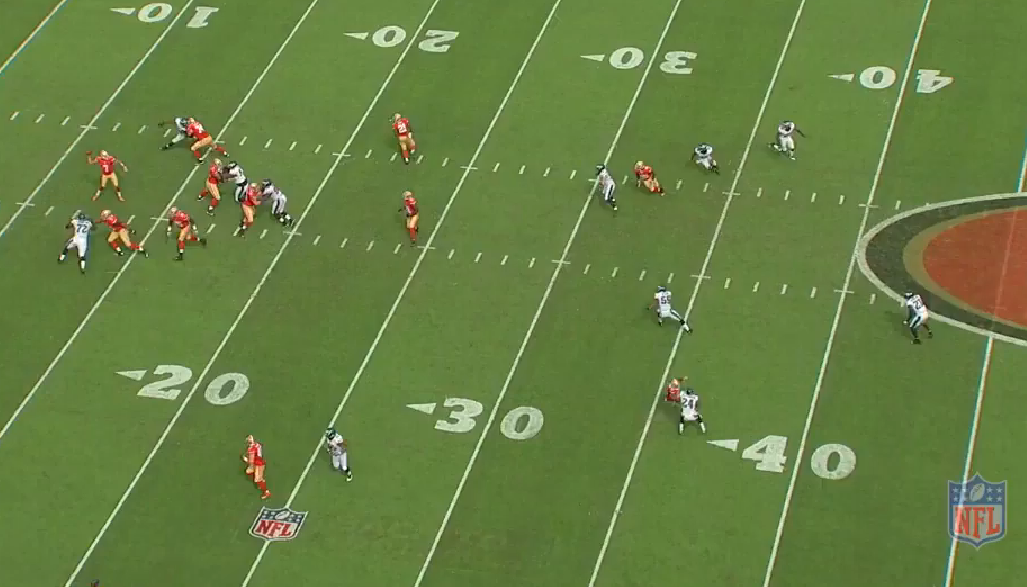
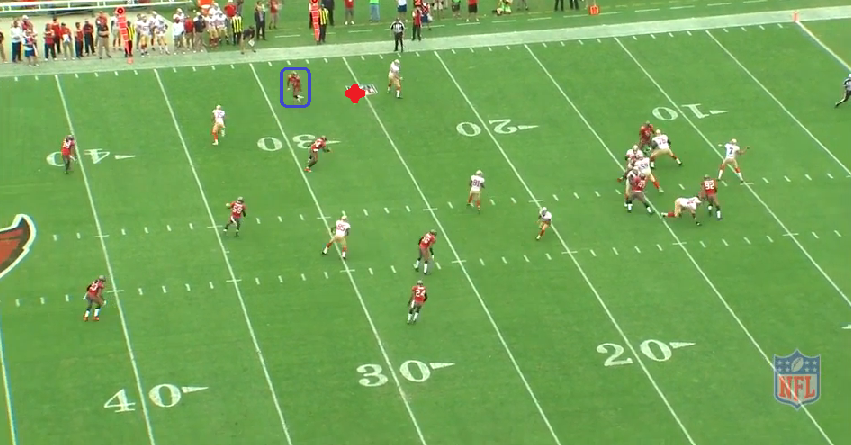
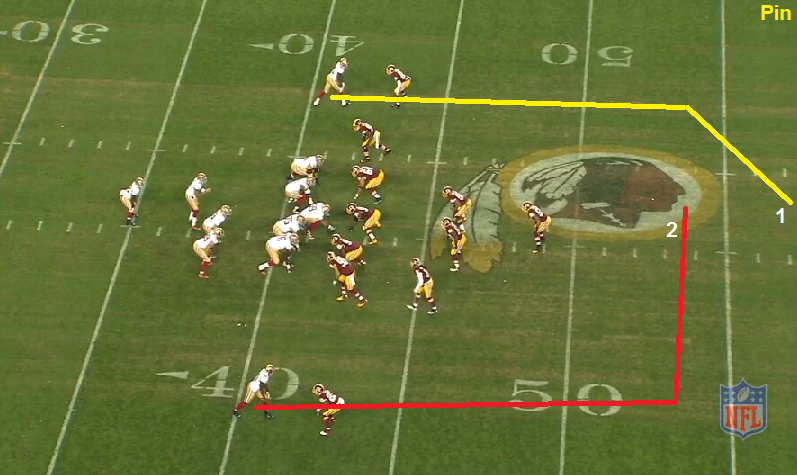
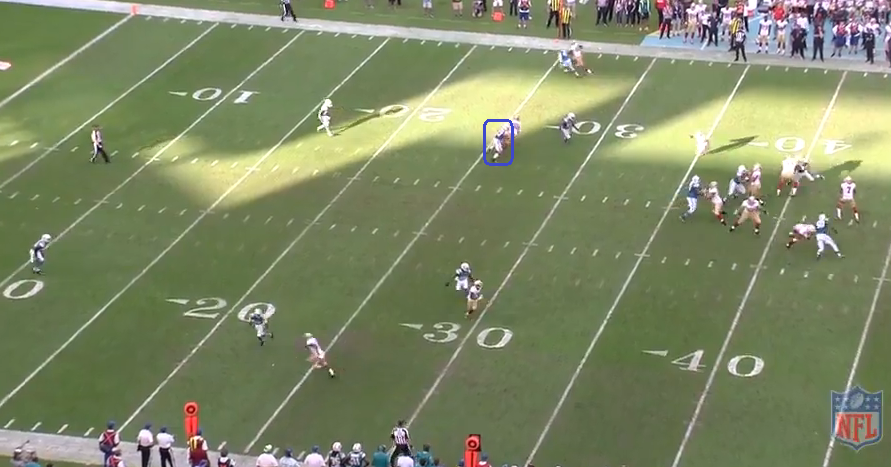
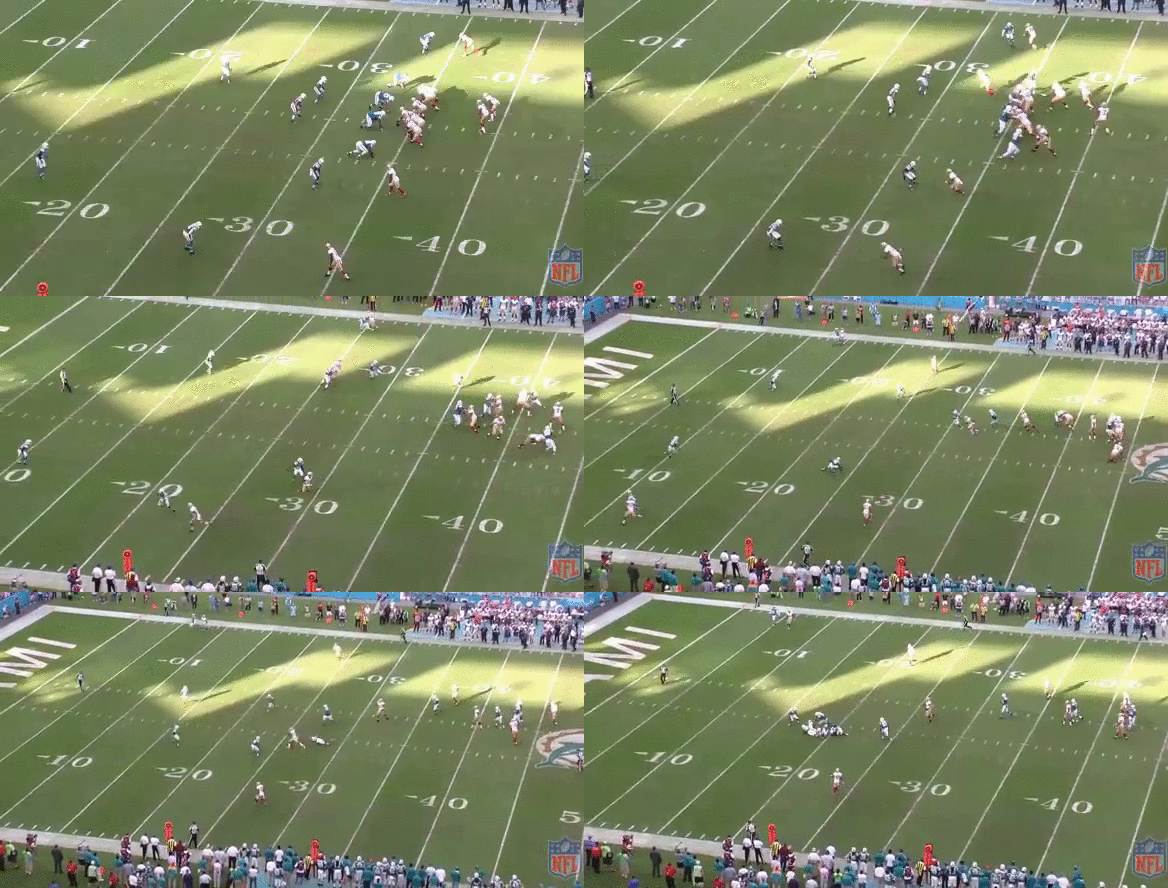
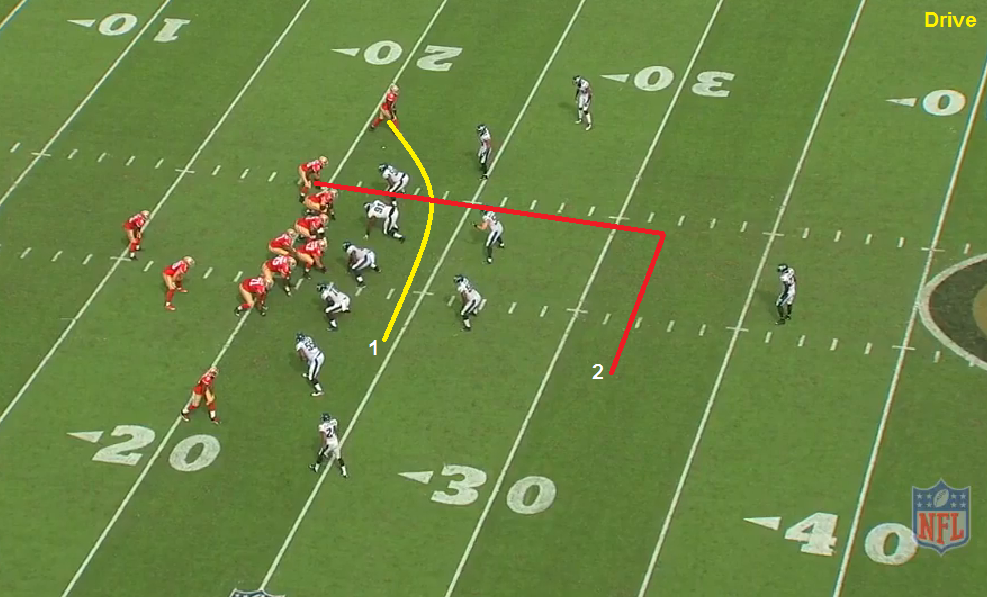
Drive concept
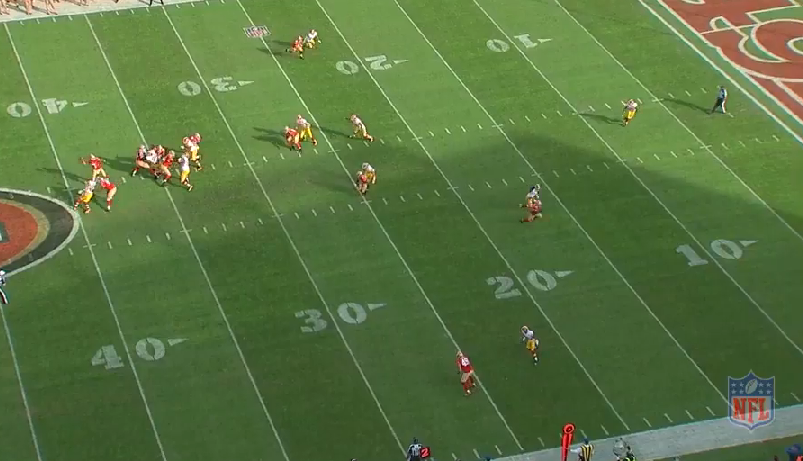
- Vertical stretch to hook/curl zone defenders; Drag route can win versus man coverage
- Effective against: Cover 3, Cover 2 Man, Cover 2 Zone
- Progression: Drag - Square In (Low - High); 5 step timing
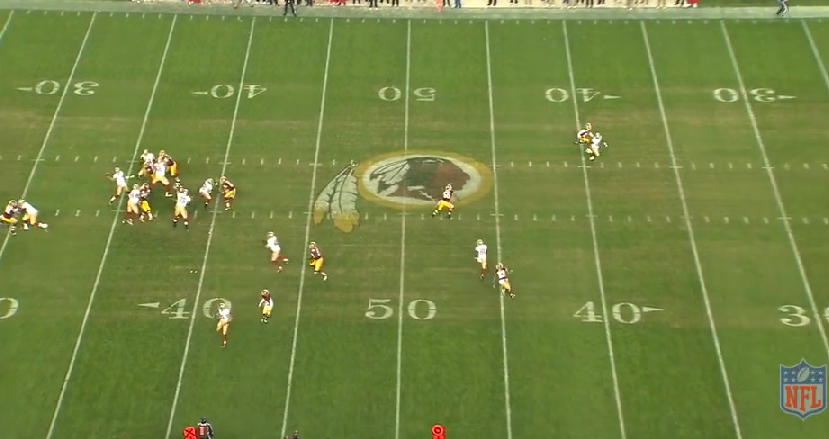
The Hook defender gains depth to cover the Square In. This opens up the Drag.
The Square In route will continue running if it's man coverage, or will sit in a quiet area if it's zone.
There are 248 users in the forums
All22 Analysis - Coverages & Concepts
May 13, 2015 at 3:36 PM
- thl408
- Moderator
- Posts: 33,087
May 20, 2015 at 12:16 PM
- thl408
- Moderator
- Posts: 33,087
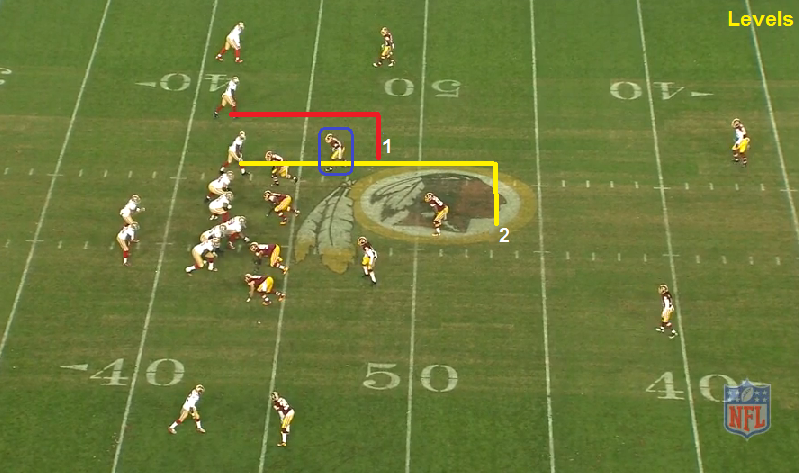
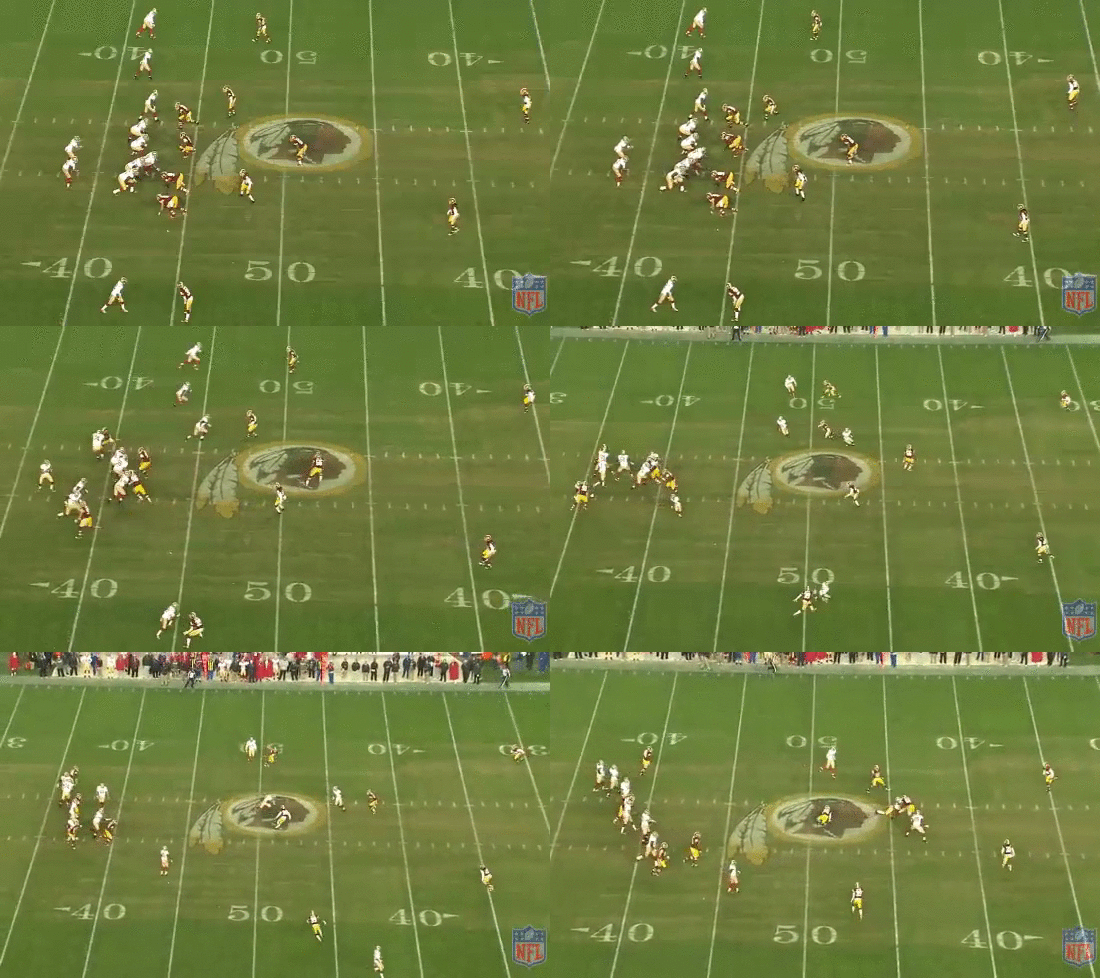
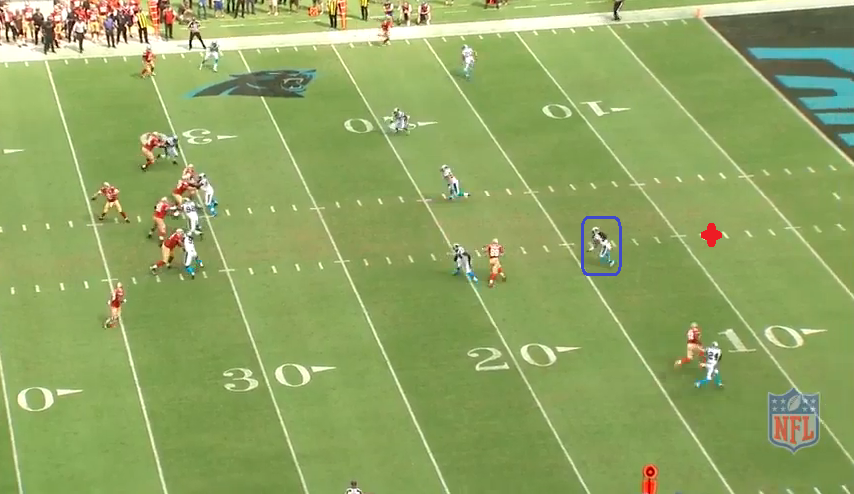
Levels concept
- Vertical stretch to hook/curl zone defenders
- Effective against: Cover 1, Cover 2 Zone, Tampa 2
- Progression: Low - High; 5 step timing
The intermediate (inside) In route runs at a depth behind the LB level. The outside In route, runs at the LB level.
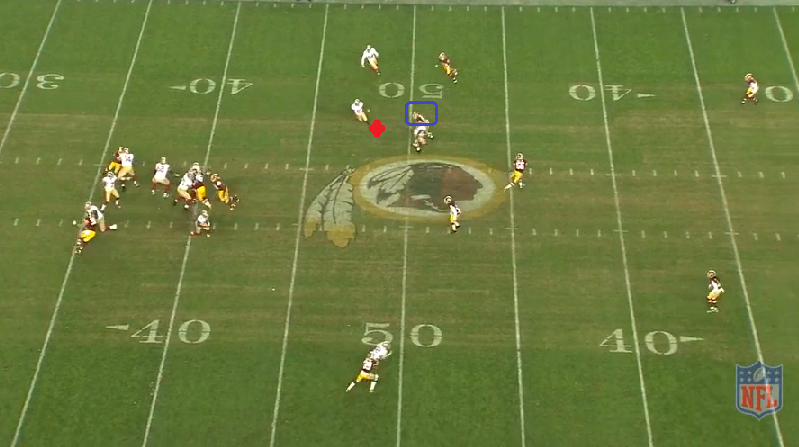
The Hook zone defender gains depth to cover the inside route. This opens up an area for the red route to work.
If the stretched defender was at the red dot, then the correct throw would be to the yellow route.
versus Tampa2
May 20, 2015 at 12:23 PM
- thl408
- Moderator
- Posts: 33,087
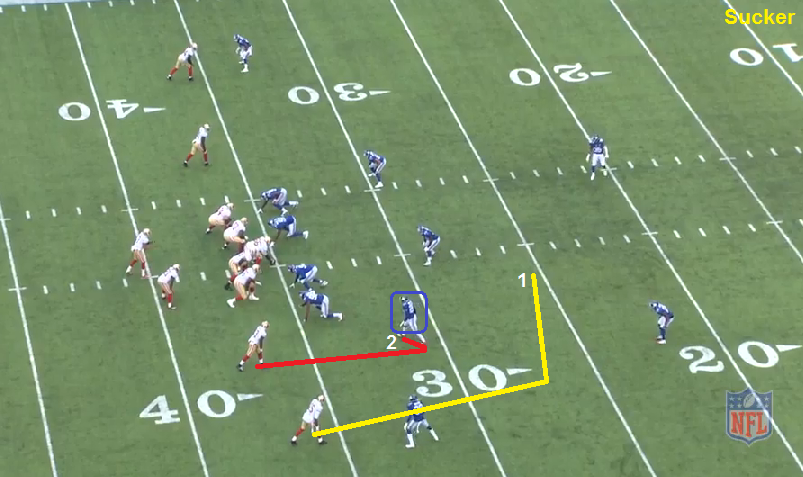
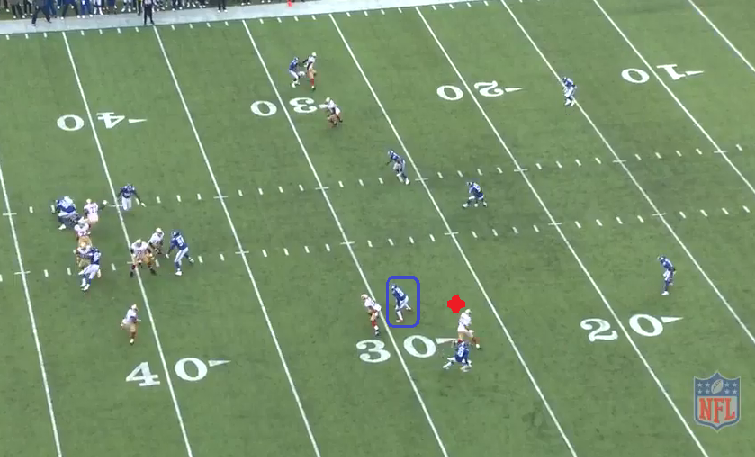
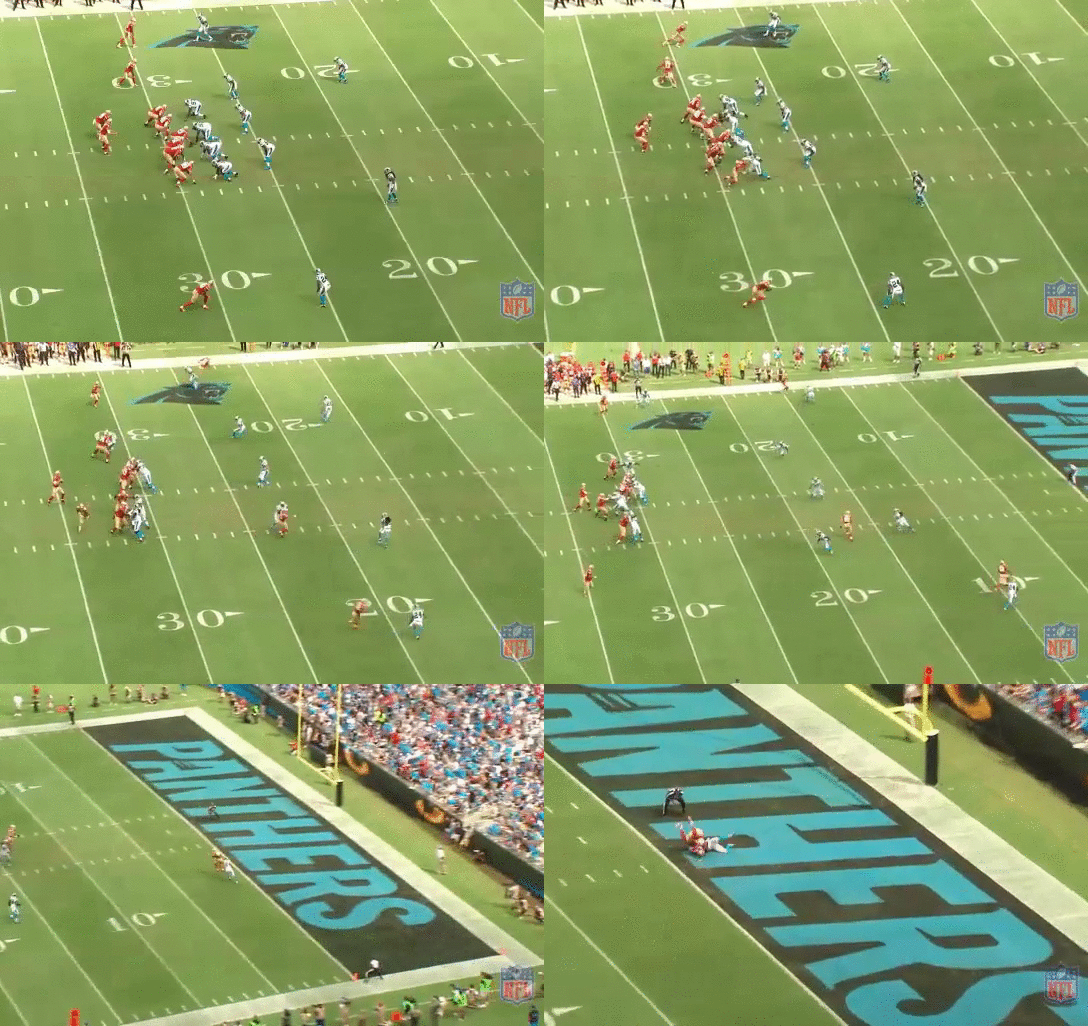
Sucker concept
- Vertical stretch to hook/curl zone defender
- Effective against: Cover 3, Cover 2 Zone, Tampa 2
- Progression: In - Curl (High to Low); 5 step timing
The Curl is used to 'suck' the coverage towards it and open up the area behind for the In route to work.
The Curl draws the attention of the Hook zone defender.
If the defender was at the red dot, then the correct throw would be to the Curl.
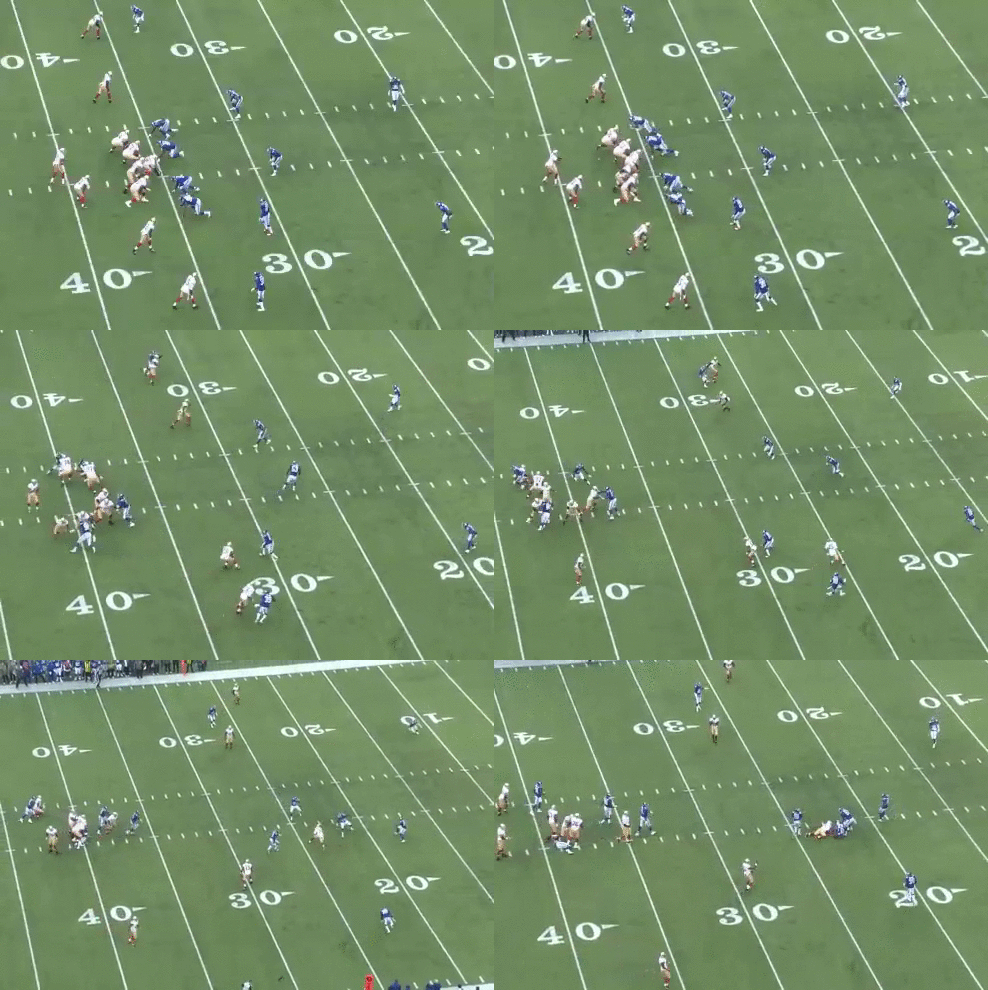
vs Tampa 2
The Curl is run directly at the stretched defender to intentionally draw attention.
May 20, 2015 at 12:25 PM
- thl408
- Moderator
- Posts: 33,087
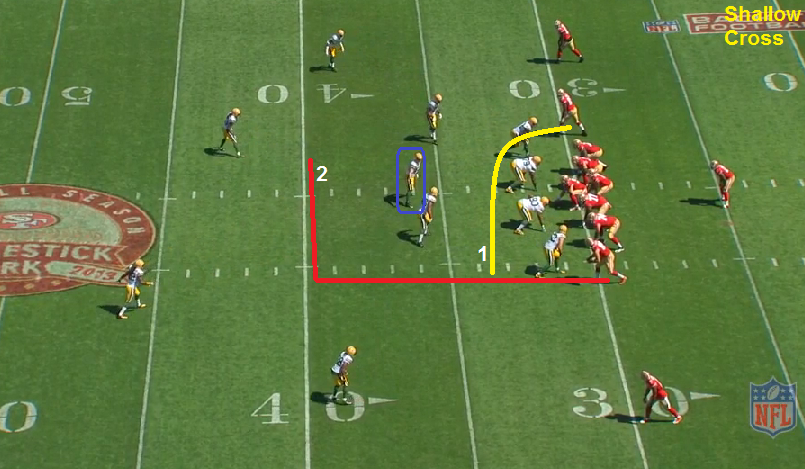
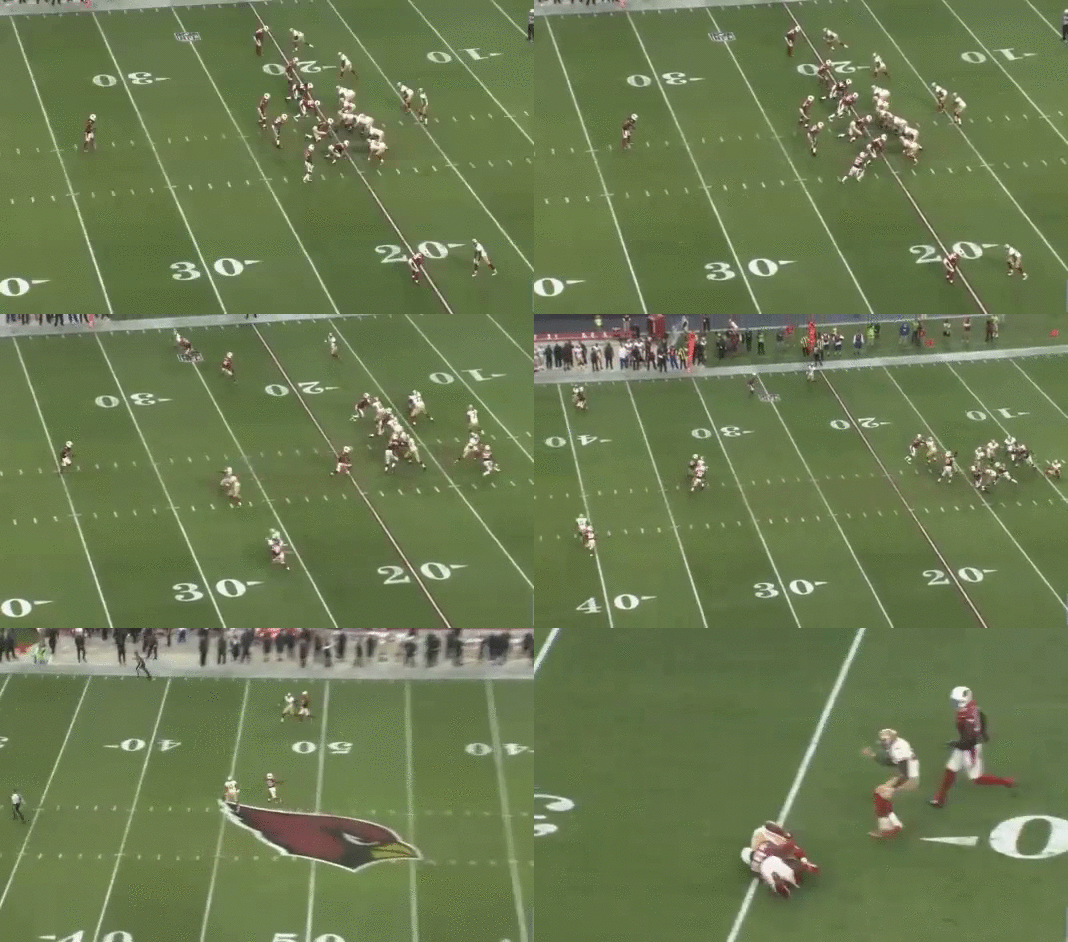
Shallow Cross concept
- Vertical stretch to hook/curl zone defenders; Drag route can win versus man coverage
- Effective against: Cover 3, Cover 1, Cover 2 Man
- Progression: Drag - Square In (Low to High); 5 step timing
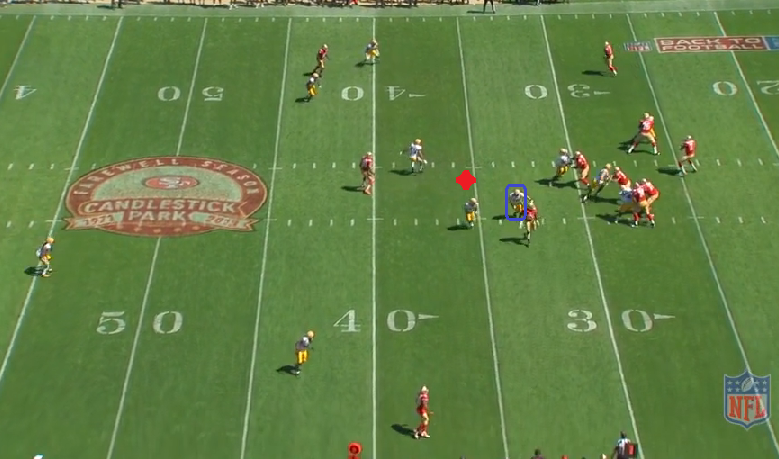
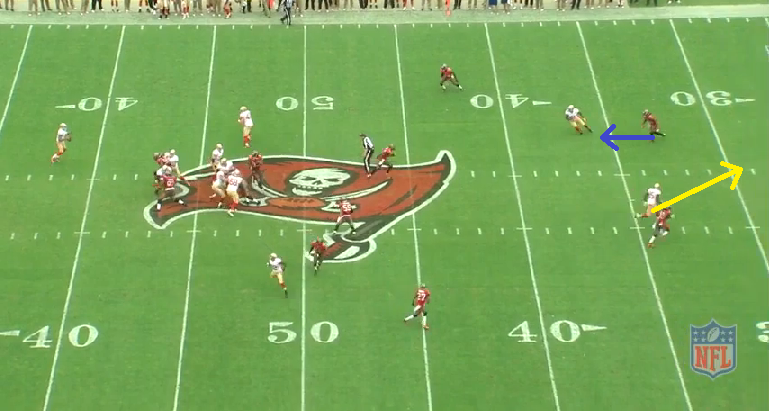
Similar to Drive concept, but the routes come from opposite sides of the formation. The Drag route flashes in front of the LB level defenders. The Square In route is run at a depth behind the LB level.
The Drag draws the attention of the underneath zone defenders. The Crossing route settles into a quiet area.
If the underneath zone defenders gained depth to cover the Cross (red dot), then the correct throw would be to the Drag.
versus Cover6
May 20, 2015 at 12:27 PM
- thl408
- Moderator
- Posts: 33,087
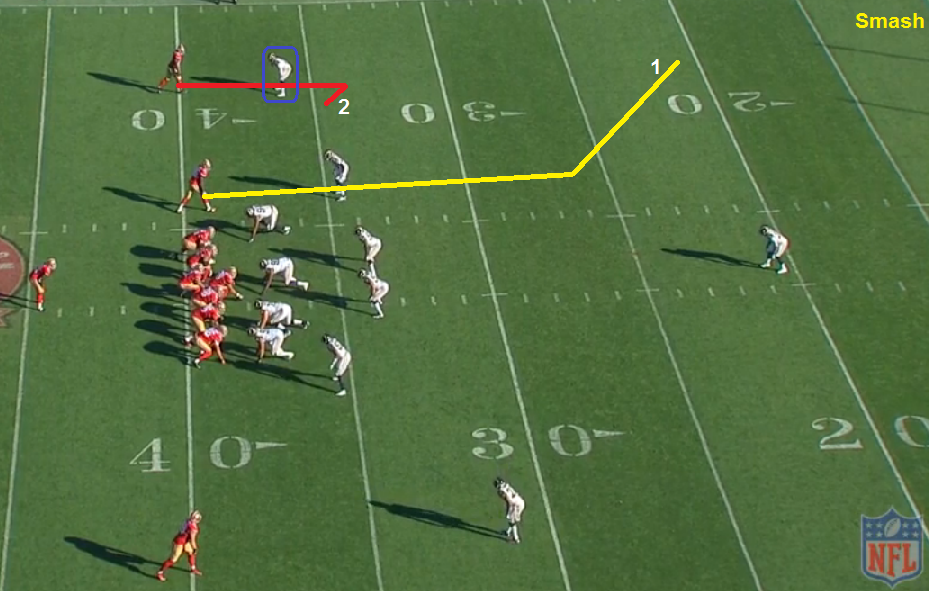
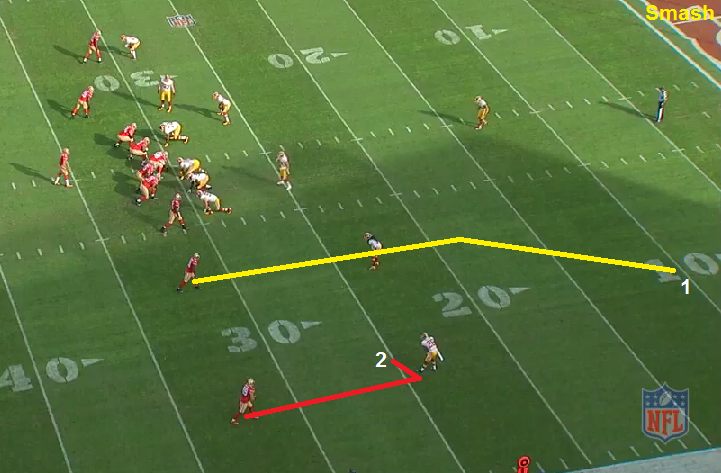
Smash concept
- Vertical stretch to sideline zone defender; Corner route can win versus man coverage
- Effective against: Cover 2 Zone, Cover 1
- Progression: Corner - Curl (High to Low); 5+ step timing
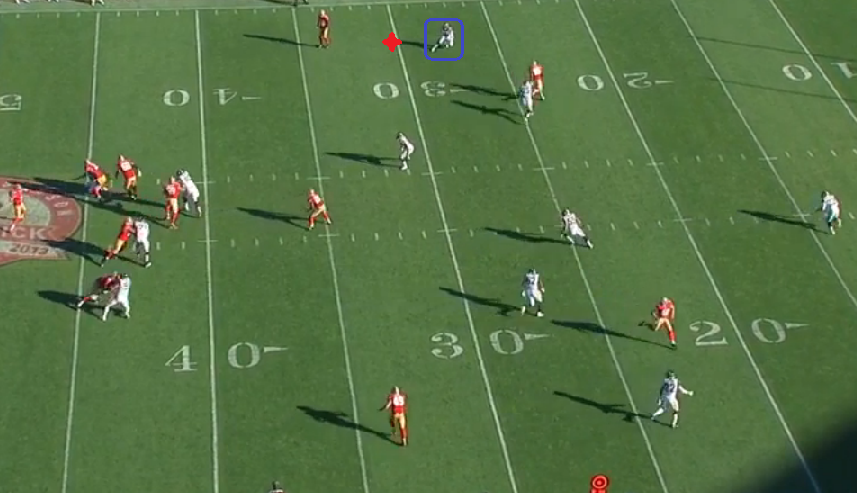
The sideline defender sinks in depth to cover the Corner route. The correct throw is to the Curl.
If the stretched defender came forward to the red dot to cover the Curl, then the Corner route would be open.
______________________________
Versus Cover 1, the Corner route can win if it has outside leverage on the CB.
With only a cover 1 safety in the middle of the field, and the Curl route preventing the CB from sinking in depth, the Corner route has a lot of room to work.
May 20, 2015 at 12:33 PM
- thl408
- Moderator
- Posts: 33,087
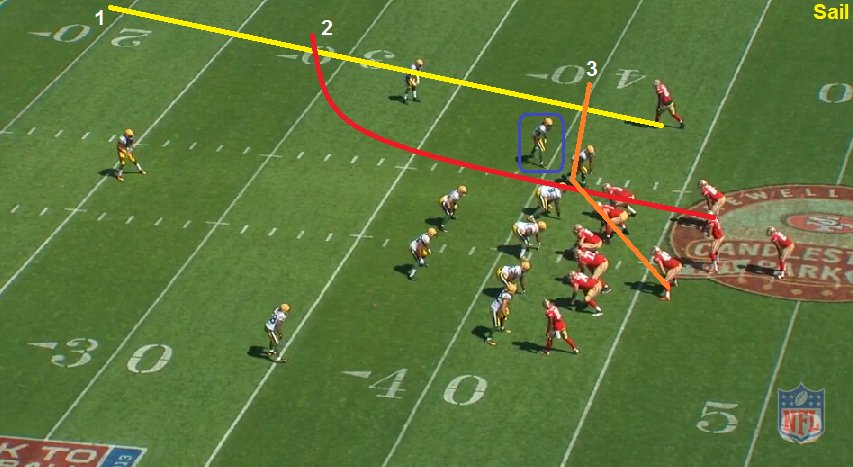
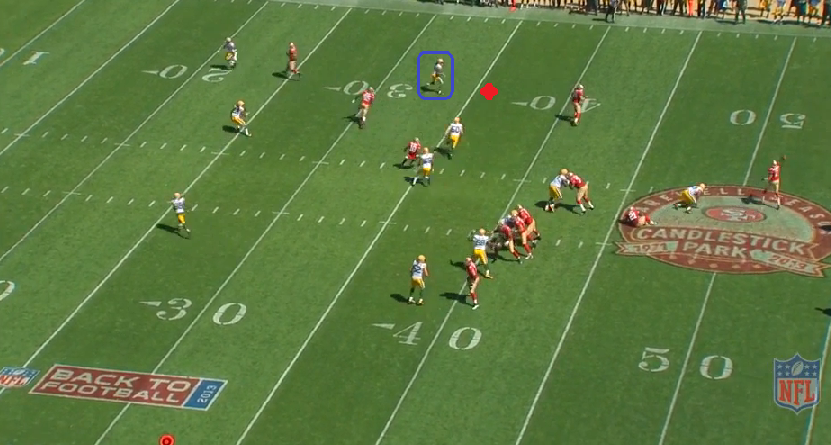
Sail concept
- Vertical stretch to sideline zone defender
- Effective against: Cover 3, Cover 2 Zone, Fire Zone
- Progression: Go - Sail - Flat (High to Low); 5+ step timing
The Go route is designed to remove the deep zone defender in order to isolate the intermediate (Sail) and short (Flat) routes against the curl/flat defender.
The stretched defender gains depth and takes away the Sail. The correct throw is to the Flat.
If the stretched defender was at the red dot, then the correct throw is to the Sail.
versus Cover3
------------------
vs Cover3
The stretched defender covers the flat - Sail route open.
May 20, 2015 at 12:41 PM
- thl408
- Moderator
- Posts: 33,087
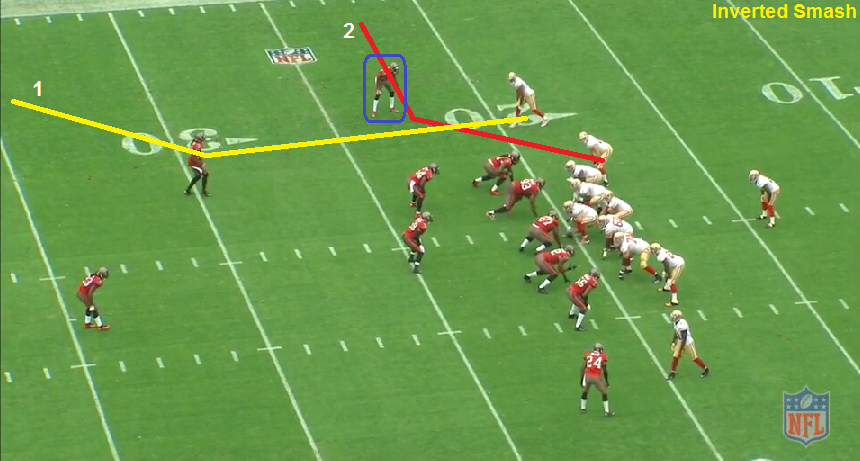
Inverted Smash
- Vertical stretch to sideline zone defender
- Effective against: Cover 2 Zone, Tampa 2, Cover 3
- Progression: Corner - Flat (High to Low); 5 step timing
The outside WR runs the Corner, and the slot WR runs a Flat route. This reverses the roles from the Smash concept to stretch the sideline zone defender.
The stretched defender turns his hips to shade towards the Corner. The correct throw is to the Flat.
If the vertically stretched defender was at the red dot, then the correct throw would be to the Corner.
vs Tampa 2
May 20, 2015 at 12:51 PM
- thl408
- Moderator
- Posts: 33,087
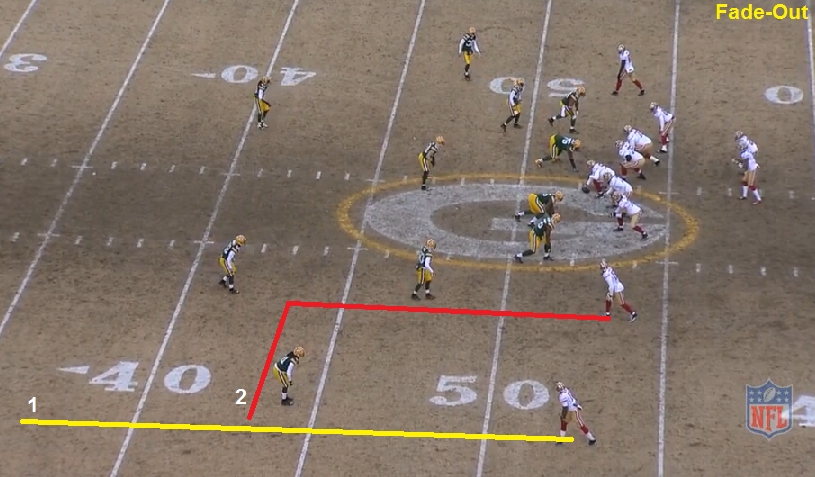
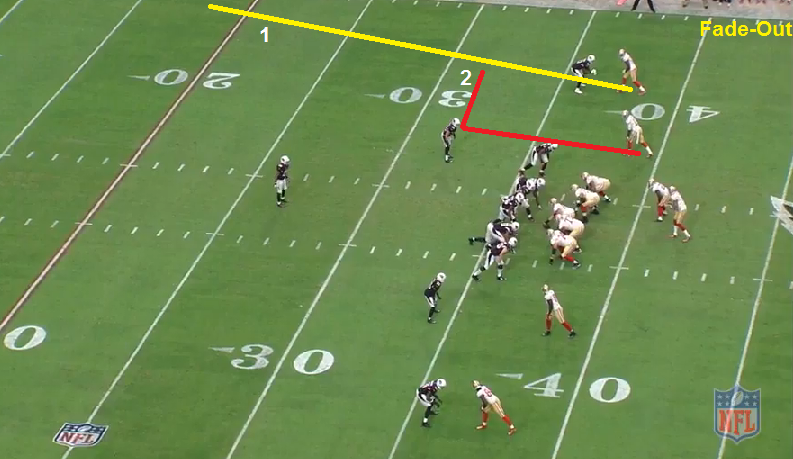
Fade-Out (Z concept)
- Vertical stretch to sideline zone defender
- Effective against: Cover 2 Zone, Cover 1, Quarters
- Progression: Fade - Out; 3/5 step timing
This is called the 'Z' concept in Mike Holmgren's playbook. Will be called "Fade-Out" in reference to the route combination.
A very versatile route combination where the Fade (Go route) can be targeted to beat Cover 2 zone, or as a back shoulder throw to beat man coverage. The Fade also acts as a clearing route for the Out route to work.
The Fade must get an outside release to turn his CB's back to the play. The Out needs to win outside leverage.
Versus Quarters, the Out route gets behind the curl/flat defender, and breaks in front of the safety. Fade clears the area.
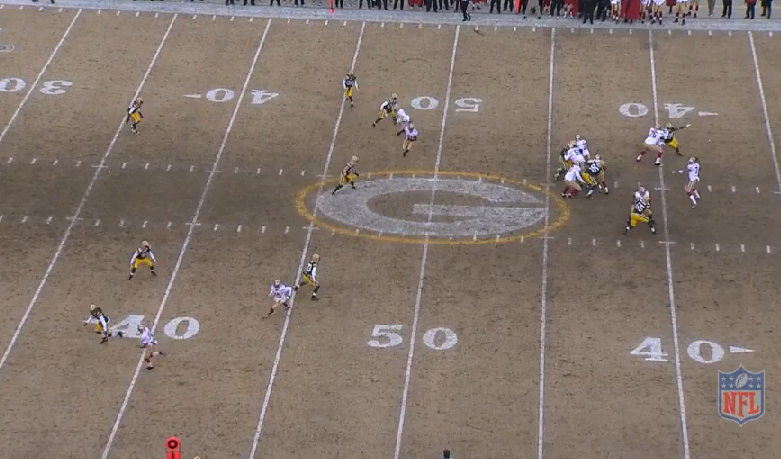
vs Cover 6 (Quarters side)
If versus Cover 2: Target the Fade that attacks the "honey hole" - the area behind a Cover 2 Zone CB, in front of the Cover 2 safety. If the CB sinks to take away the Fade, then the Out route becomes open in front of the CB.
________________________________________
Versus Cover 1: Fade can be targeted if the matchup is favorable, or it can act as a clearing route.
With the outside CB's back turned, the Out route has room to work.
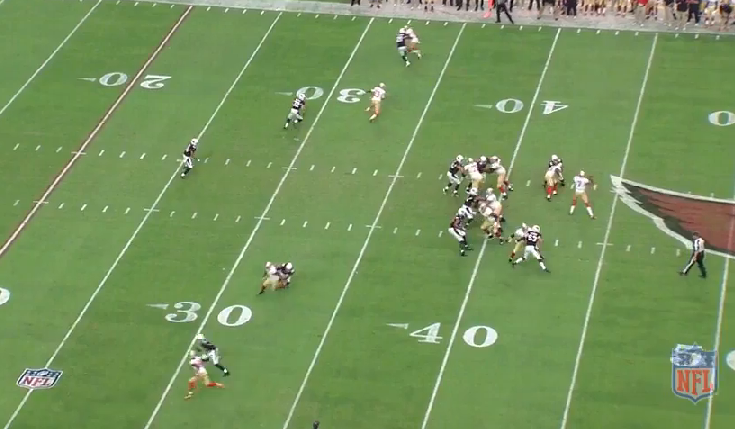
vs Cover 1
May 20, 2015 at 1:06 PM
- thl408
- Moderator
- Posts: 33,087
Mills concept
- Vertical stretch to deep zone defender
- Effective against: Cover 2 Zone, Quarters, Cover 1
- Progression: Post - Deep In (High to Low); 7 step timing
vs Cover6 (Quarters on Mills side)
Key defender breaks on the Dig route, opening the Post.
If defender was near red cross, then target would be the Dig.
The Deep In route usually breaks before the Post in order to bait the safety forward (vertical stretch) and allow the Post to threaten.
Mills vs Cover1
- Vertical stretch to deep zone defender
- Effective against: Cover 2 Zone, Quarters, Cover 1
- Progression: Post - Deep In (High to Low); 7 step timing
vs Cover6 (Quarters on Mills side)
Key defender breaks on the Dig route, opening the Post.
If defender was near red cross, then target would be the Dig.
The Deep In route usually breaks before the Post in order to bait the safety forward (vertical stretch) and allow the Post to threaten.
Mills vs Cover1
May 20, 2015 at 4:45 PM
- thl408
- Moderator
- Posts: 33,087
Pin concept
- Vertical stretch on deep zone defender (safety)
- Effective against: Cover 1, Quarters, Cover 2 Zone
- Progression: Post - Deep In (High - Low); 7 step timing
Called "Pin" because of the route combination (Post + In). The deep In route, run behind the LB level, is designed to draw up the safety on that side of the field, then have the Post attack the area behind the stretched safety.
The defense is in some odd cover 0, so there is no safety to stretch on this play.
_____________________________
This is a Post + Deep Curl combination where the stretch applied to the safety is like that of the Pin concept.
May 20, 2015 at 4:46 PM
- thl408
- Moderator
- Posts: 33,087
Speedo (Z cross) concept
- Vertical stretch to sideline zone defenders
- Effective against: Cover 2 Zone, Tampa 2, Cover 3
- Progression: Go to Crosser to Flat (High to Low)
- Vertical stretch to sideline zone defenders
- Effective against: Cover 2 Zone, Tampa 2, Cover 3
- Progression: Go to Crosser to Flat (High to Low)
May 20, 2015 at 4:47 PM
- thl408
- Moderator
- Posts: 33,087
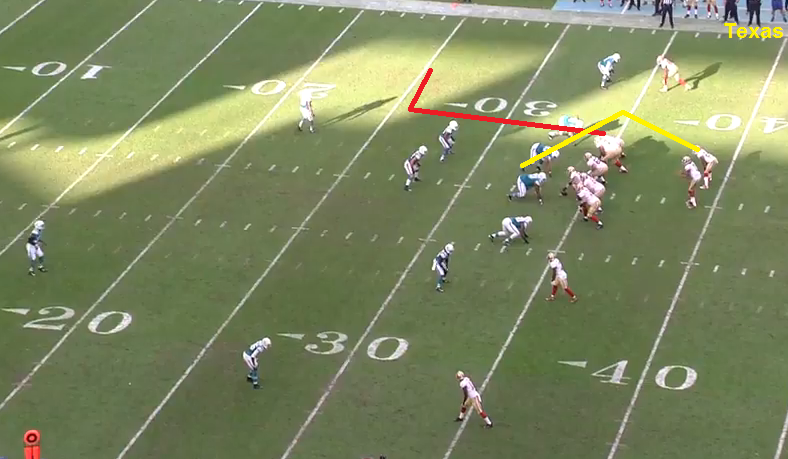
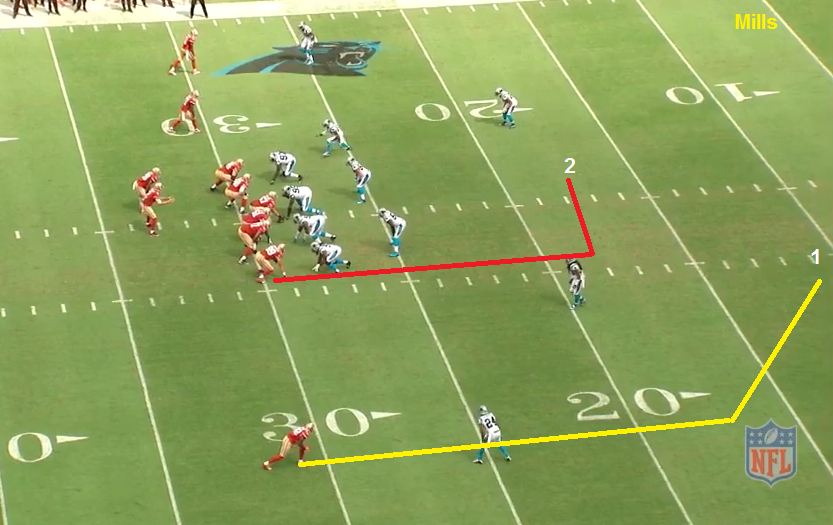
Texas concept
- Vertical stretch to Hook zone defender
- Effective against: Tampa 2, Cover 2 Zone, Cover 2 Man, Cover 1 Blitz
- Progression: Angle - Out; 5 step timing
Red creates space for yellow to work.
Against man coverage, the red route clears the blue defender from the area.
vs Cover2 Man
- Vertical stretch to Hook zone defender
- Effective against: Tampa 2, Cover 2 Zone, Cover 2 Man, Cover 1 Blitz
- Progression: Angle - Out; 5 step timing
Red creates space for yellow to work.
Against man coverage, the red route clears the blue defender from the area.
vs Cover2 Man
May 20, 2015 at 5:15 PM
- thl408
- Moderator
- Posts: 33,087
.
May 20, 2015 at 5:15 PM
- thl408
- Moderator
- Posts: 33,087
...
May 20, 2015 at 5:15 PM
- thl408
- Moderator
- Posts: 33,087
...